At the Vermont Evaporator Company, we aim to bring the tech of big maple to the maple hobbyist! We’ve designed an open-air evaporator that gives you efficiency with a baffled pan (The Sapling). We invented the world’s smallest RO system for maple syrup with a UV filter to help make your sap store longer (the Sugar Cube ZB). We’ve designed our Beginners Tubing Kit for 25 Taps to bring the convenience of tubing to your backyard operation.
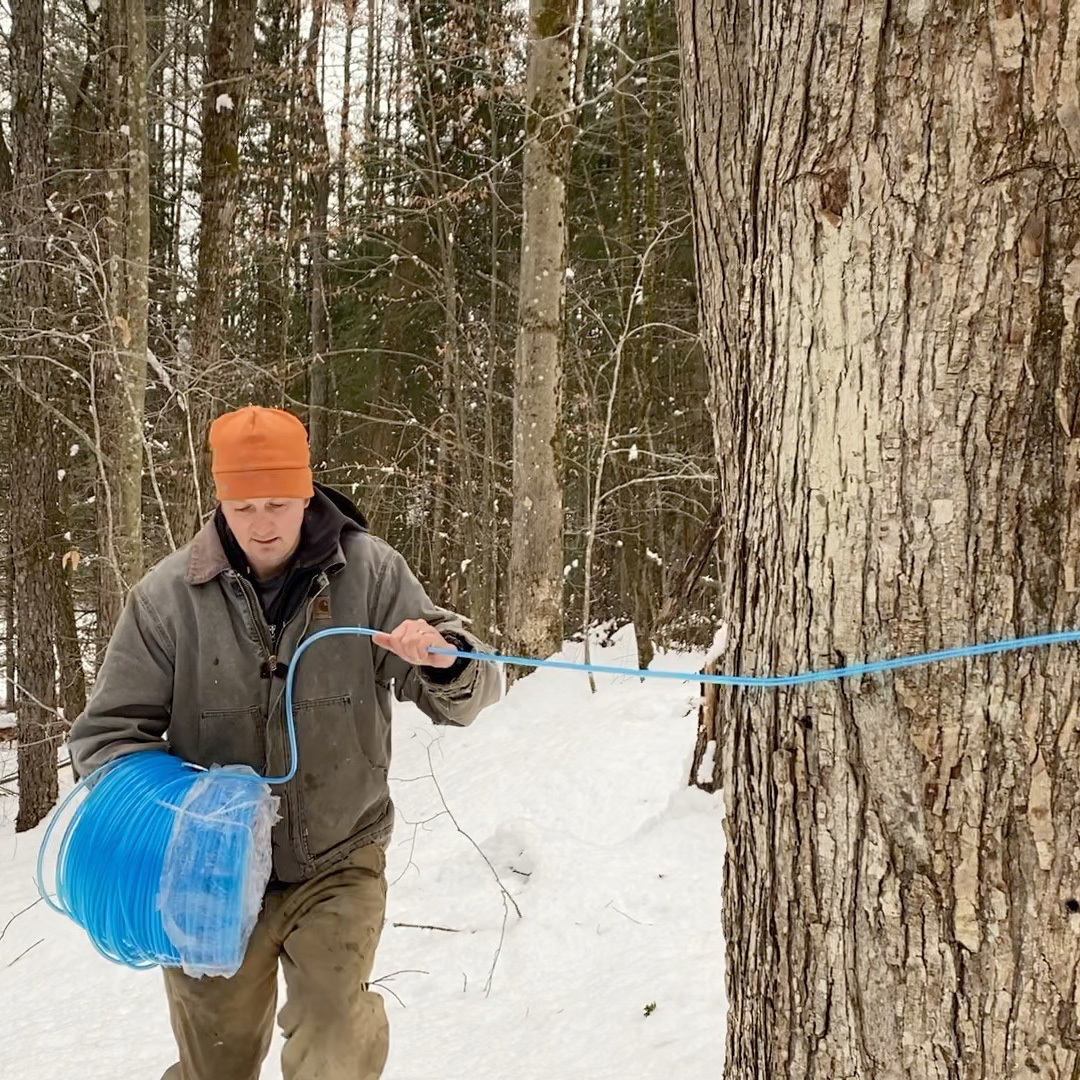
And while we love tech, we also love the romantic, old-timey, maple syrup-making hobby of generations past. This, and because they love to hear the “ping – ping – ping” of the sap running, Nikki and Paul continue to use buckets at their houses. But when you get more trees than you can practically get to after work each day, you need a different approach. At Kate and Justin’s house (pictured above), they run lines for their 100-and-growing tap hobby.
When you’re learning to run lines, it’s important to remember this: running lines for a maple hobby is more art than science. We’ve been running lines for a few years now, and here are the basics that we think are important!
Tools For Running Lines
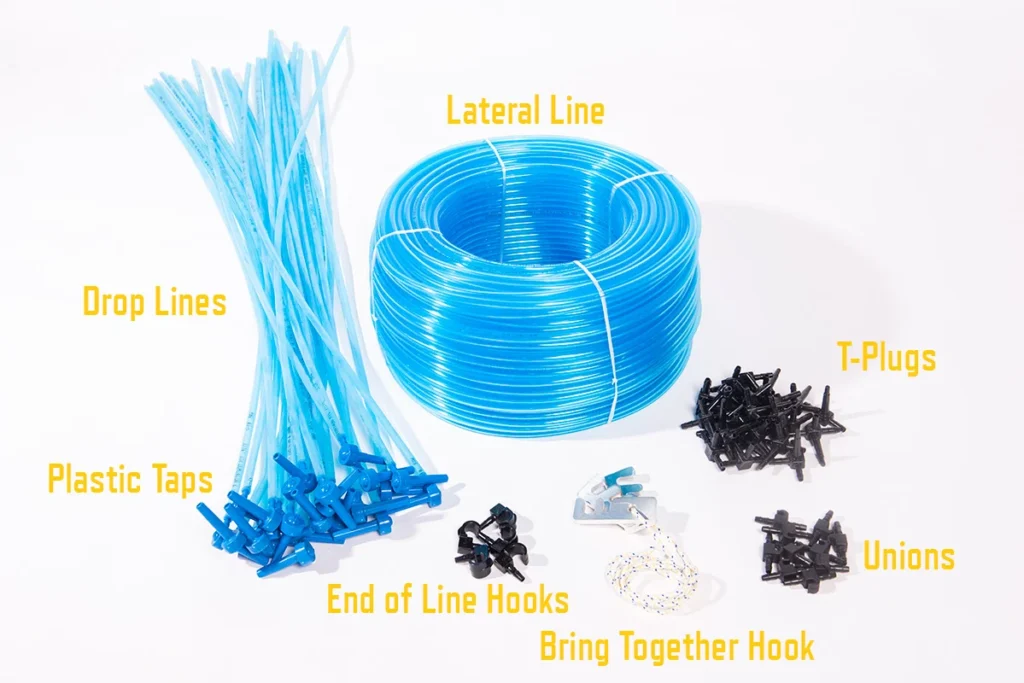
You don’t have to wait until it’s time to tap to run lines in your sugar woods. You can run lines at any time of the year, and then tap when the weather is right and tie in to the tubing system you previously ran. In order to run your lines, you will need:
- a travel mug of hot water,
- lateral tubing (we use 3/16″),
- end of line hooks for 3/16″ tubing,
- unions for 3/16″ tubing,
- some wire to create tension at your sap collection point, OR a hammer and nails, depending on the method you use. See below for more details!
Know Your Sugarbush
The first step for running line is to figure out where you’d like your line to go. Every sugarbush is unique, and you’ll know your sugarbush best. If you have a bunch of maple trees all in a line uphill from a convenient storage place, you may run a single lateral line from the furthest-out tree to the vessel. If your trees are all bunched up on a slope above a convenient collection point, you may use a hub-and-spoke approach, running multiple lateral lines from the furthest-to-reach trees to your collection vessel. If your trees are scattered about your property, you may choose to run several lateral lines emptying into separate collection containers. Whichever layout you choose, we recommend that line segment collect from no fewer than five trees.
You should plan on at least one gallon of storage per tap per day. For storage, we recommend our Food-Grade, 5-gallon Sap Storage Buckets with Lids.
Running Lines – The Lateral Line
The next step is to set up your lateral tubing. That is the main piece of tubing that will move all the sap from the uphill trees to the downhill collection point. You need to make sure you have enough line to weave around and in between a few trees, and make it down to the collection point(s).
To begin, you’ll use an end-of-line hook to secure the lateral tubing to itself around the tree that’s farthest away from your collection point. We recommend dipping the end of the tubing into a cup of warm water to make the tubing more flexible. Then simply insert the end of line hook into the end of the tubing and wrap it around the tree. You’ll then slip the tubing into the “hook” part of the end of line hook to hold the tubing.
Our Beginners Tubing Kit for 25 Taps comes with 5 end-of-line hooks so that you can have up to 5 separate lateral lines. These can move toward the same or different, individual sap collection points.
Hang Your Lateral Line
When choosing how high up the tree to affix your line, remember that you will want your line to slope gently downward on its way to sap collection (gravity!) but be below your tap (gravity, again.)
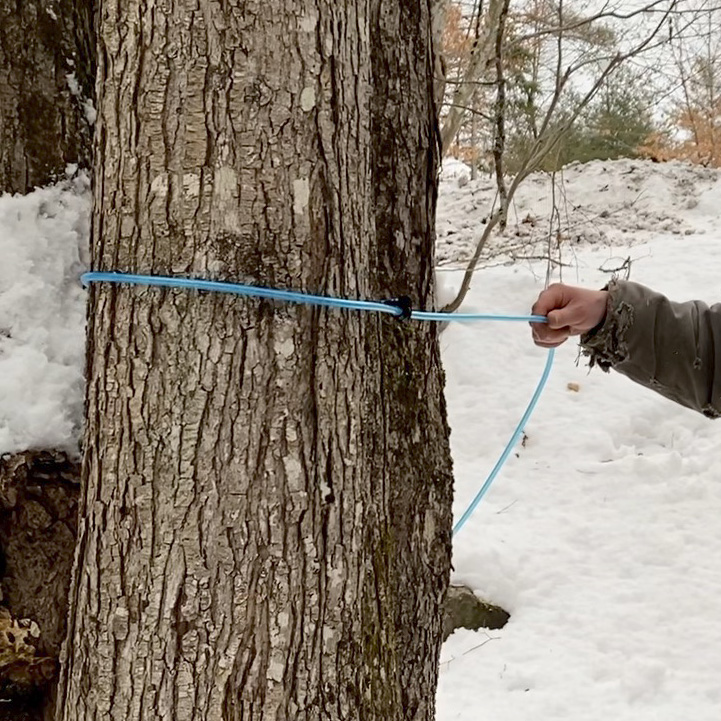
Weave your lateral line on alternate sides of the other trees you will tap, keeping the line taught and at a descending angle. If you need to for stability, you can wrap the line around a tree here and there.
The Collection Point
It is important to keep the lateral line taut as it enters the collection point. There are several ways to do this. Here are two:
Use a Union
When you arrive at your sap collection point(s) (or, periodically, as needed) use a union fitting to snug your lateral line to the tree. To do so, cut your lateral line and insert both fresh ends of the line onto the two ends of the union (using your hot water to soften the lateral line as needed). Nail the union to the tree so that the lateral line is snug. If you are at your collection point, let your lateral line drop from the Union and cut it off so that it’s long enough to fit into your collection container.
Running Wire
When you arrive at your sap collection point(s) (or, periodically, as needed) run some wire between two trees so that the wire runs perpendicular to the lateral line where the line needs some support. Cut the line at the support point and use a union to connect the wire to your lateral line at that point.
When running wire, be sure to distribute the pressure of the wire on each tree by using a sturdy buffer such as a few pieces of wood, or a section of mainline or other flexible tubing. Otherwise, you may girdle (strangle) the tree.
How to Tap A Tree For Running Lines
When you are ready to tap, this is what you will need:
- a travel mug of hot water,
- a cordless drill with a 5/16″ bit ,
- a hammer,
- plastic taps (we use a 5/16″ tap that fits 3/16″ tubing),
- droplines (we use 3/16″),
- t-plugs for 3/16″ tubing,
- a bring together hook, and
- a helper (optional).
Before you go outside, you will want to fit your taps into your drop lines. It’s easiest to do with bare hands and a bit of hot water to help the drop line expand. Simply warm up one end of each line in the water for a few seconds, and insert the shorter end of the tap into the drop line. Now you’re ready to tap. Bring your travel mug with you!
Remember The Snow!
Proceed to your first tree. Choose a height that is both convenient for the driller and within 3 feet of your lateral line. Choose a spot that is easy to drill at that moment, but also think about the current depth of the snow. Any snowmelt will put the collection container further away from you as the season progresses. Keep it within reach in case you need to service your tap and for when you pull taps in the spring.
Having settled on a height, inspect your tree. For best results, you should choose a place on the tree that is either below a big branch or above a big root, and not near a knot or wound in the tree. Cardinal direction doesn’t matter too much–every year you should tap at least 6″ away, horizontally, and 12” away, vertically, from the prior year’s tap anyway–but a southern tap will flow before a northern one, so do think about how you’d like to time your season this year.
Tap Your Tree
When you’ve chosen your spot, drill a hole of about one and one-half inch deep. Look for nice, light, creamy wood chips and sawdust coming out. If what you see is dark or dead, find another place on the tree to tap and try again.
When you have your hole, set your tap in the hole by gently tapping it with your hammer. Now it’s time to connect your drop lines to your lateral lines. This is the part where you either need a helper or to learn to use your bring together hook. You will connect your drop line to the lateral line by cutting the lateral line and inserting the three open ends of a t-plug into the two severed ends of the lateral line and the bottom of the drop line. The challenge is in maintaining tension on the lateral line after making the cut without having three hands. If you have a helper, great! But you can also go solo by using the bring together hook provided in your kit to keep the lateral line taught with one hand while cutting and inserting fittings with your other.
Now it’s time to wait for the sap to run!
Running lines with Justin! To watch Justin running lines in his woods, check out the video below:
FOR MORE INFORMATION ON MAKING YOUR OWN, HOMEMADE MAPLE SYRUP CHECK OUT OUR OTHER HELPFUL HOW-TO BLOGS:
How to Filter Homemade Maple Syrup


