
You’re ready to make maple syrup! You’ve tapped your maple trees, collected and stored maple sap. The weekend approaches. It’s time to boil some maple syrup! Here’s how!
Making Maple Syrup is Simple
Making maple syrup is a simple process that involves removing most of the water from maple sap. Maple sap is a weak sugar solution with a unique mix of minerals. We remove the water from sap through evaporation. Making maple syrup involves boiling most of the water away from the sap of a maple tree.
Commercial maple syrup has a very specific sugar concentration. But those of us who make syrup in the backyard don’t generally worry about that level of precision. Like horseshoes, with DIY maple, close often really does count.
Evaporation Requires Heat and a Vessel
All you need to reduce sap to syrup is a cooking vessel and a heat source. It takes 40 gallons of sap from a sugar maple to make a gallon of maple syrup. It can take more than 60 gallons of sap from a red, silver or other maple to make a gallon of syrup. So it’s best to bring some patience as well.
There are now commercially available hobby evaporators for the backyard sugar maker. These units come with instructions and, if we do say so ourselves, are a great choice for beginners. While you may find homemade units online, naturally, we have a lot to say about the benefits of our products. If you aren’t interested in investing at all in specialized equipment, though, that’s really ok! Many of us simply start out putting together a heat-source, cooking-vessel combination. You can do this from things you already own or can get on the cheap. Options abound! But some guidance is in order.
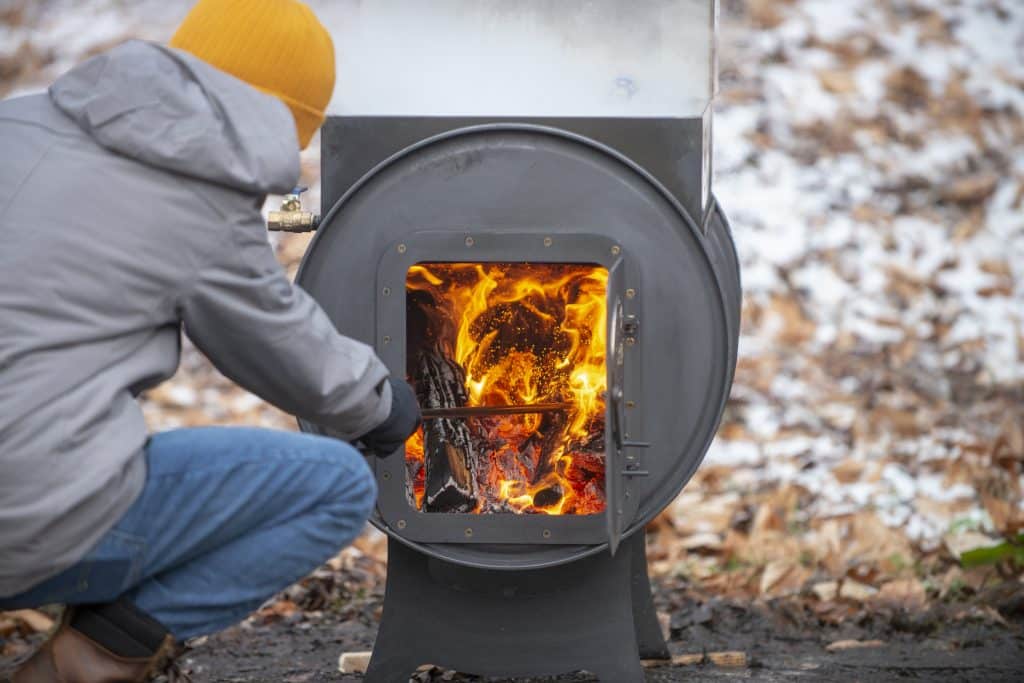
Don’t boil indoors!
First, we suggest you abandon any plans involving boiling indoors. Like a pasta pot on stovetop or a kettle on parlor stove. These methods cause a mess in your living space. We’re talking sticky cabinets and peeling wallpaper, among others. Outdoor cooking methods avoid this problem, and also . . . get you outdoors.
Heat Sources
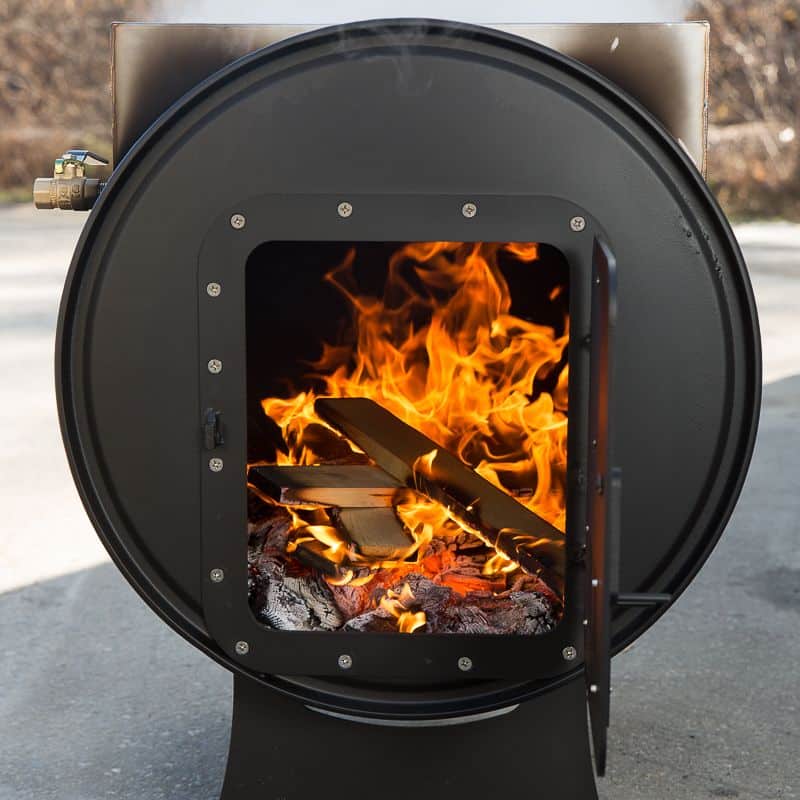
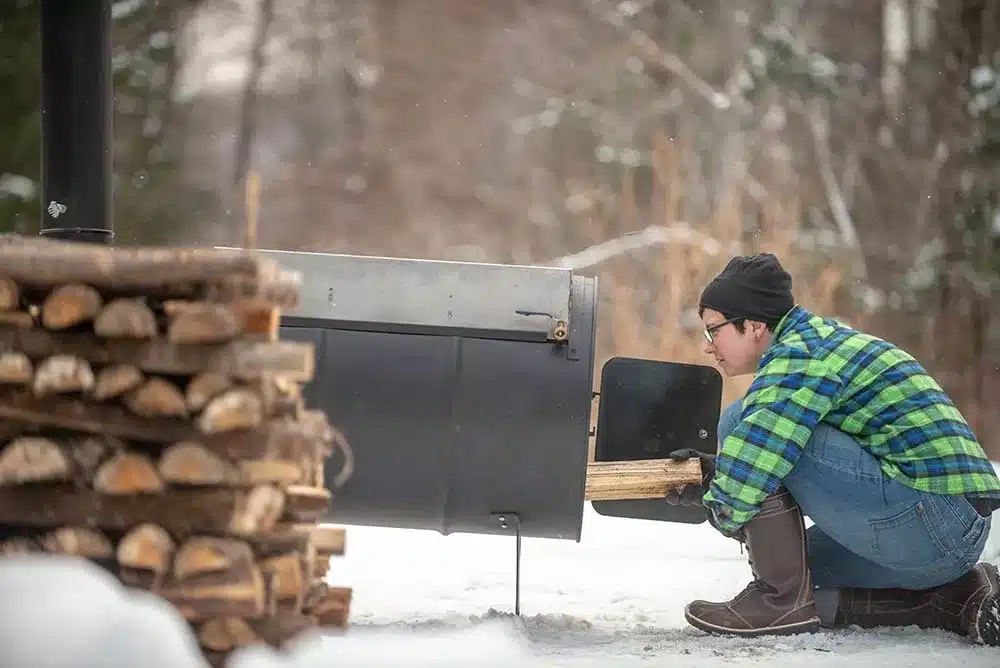
Second, think about your heat source. Wood is a great fuel for sugaring. With wood, you can make a very hot fire at a very low cost. You can sugar with wood of a different quality than what you burn in your house. Wood fires can be messy, though, and, unless you enclose the fire and direct the smoke away from your boil, your syrup may end up tasting a bit like bacon. That doesn’t bother everyone, but for those looking to avoid it, there are many common options. These including converting old wood stoves, oil tanks, barrels, or even file cabinets into an enclosed firebox. Others include assembling cinder blocks or bricks and stovepipe into enclosed, outdoor fireplaces.
Propane is a tidy, but slower and more expensive heat source. If you are using propane, opt for high-BTU burners like turkey fryers rather than using your propane grill. Be sure to protect your flame from the wind by situating yourself in a windbreak or “bricking in” your flame. And then prepare to buy A LOT of propane.
Evaporation Vessel
Third, choose your vessel. If you have purchased a special sugaring pan (yes we sell those too) it should come with instructions. These pans are handy because they are engineered for efficiency. When choosing a cooking vessel from what you already own, keep in mind that the more surface area you have, the faster your boil will go. So, tall and thin brew pots are not as good of a choice as, say, the broiling pan for your Thanksgiving turkey, for example. Many first-timers invest in one or more stainless steel buffet pans to maximize surface area while minimizing expense. Keep your eyes on the prize: making maple syrup involves boiling most of the water away from the sap of a maple tree. It is not rocket science.
Boil Your Maple Sap
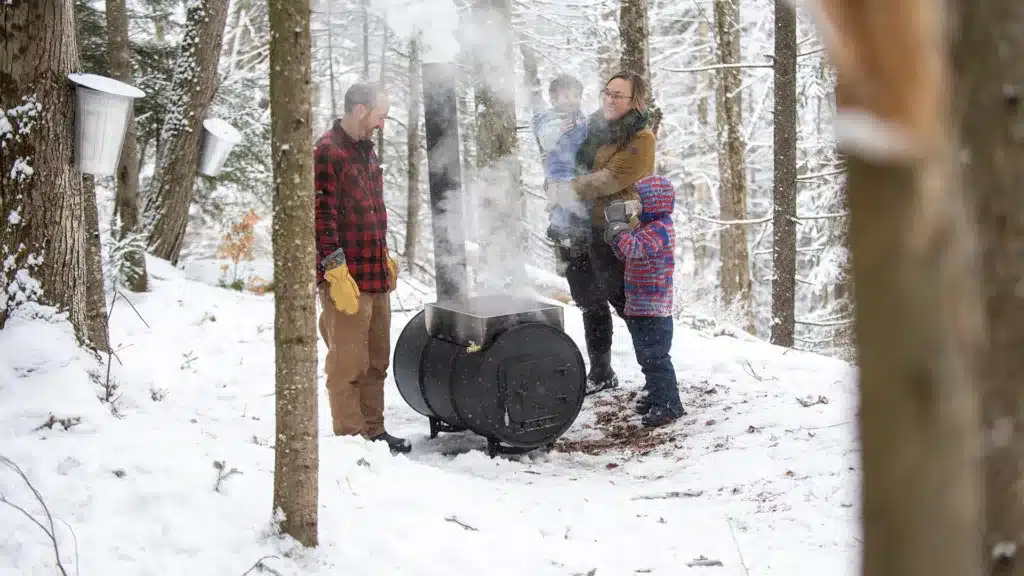
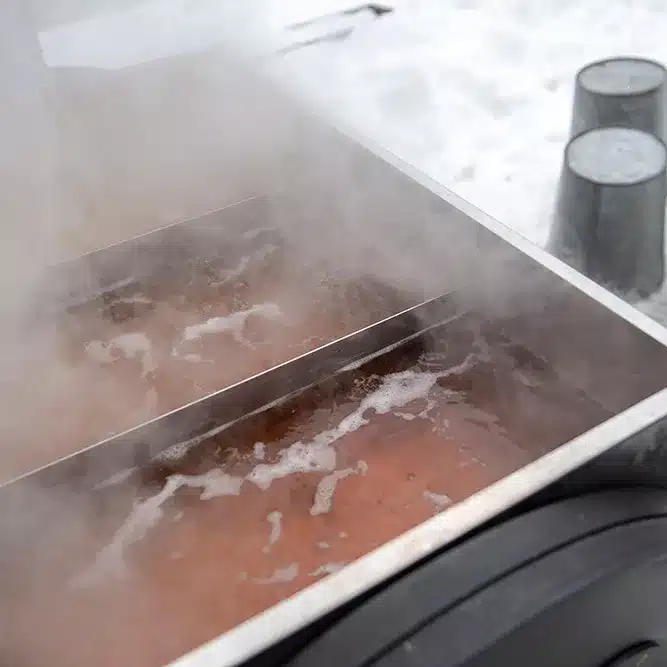
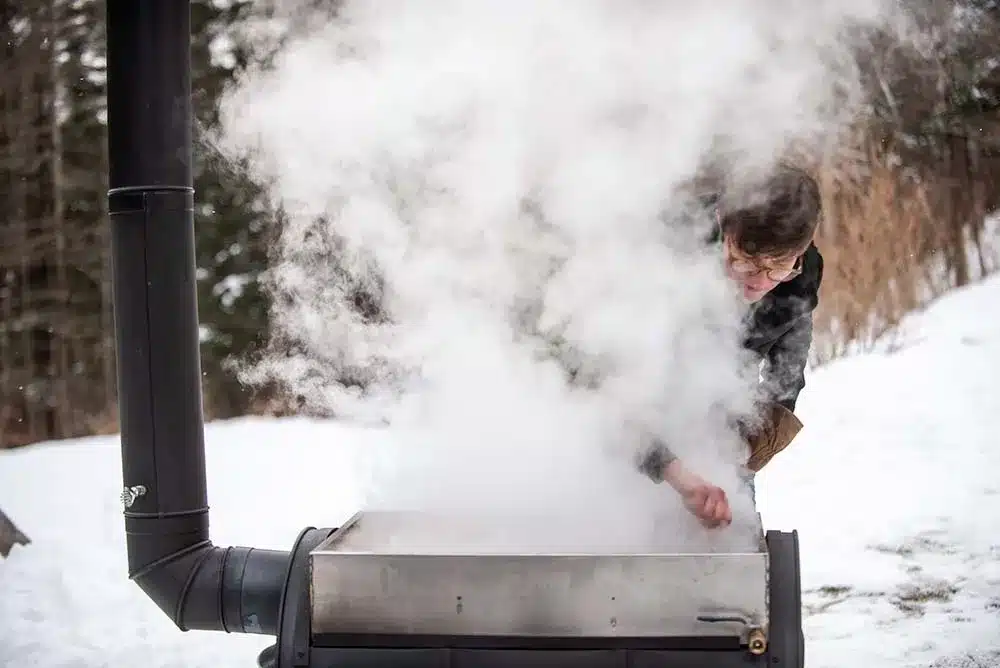
Now that you have a heat source and a cooking vessel, you can make maple syrup! To start, situate your pan over your heat source, put some sap in it, light your fire, and bring your sap to a boil. Boil some more. Next, boil. Then, keep boiling. Finally, boil. (Get the idea?) You will notice the sap level drop, and the sap itself becoming darker in color, thicker, and sweeter to the taste.
Depending on the amount of sap you have collected and the size and shape of your vessel, you may choose to boil differently. You could put all your sap in the vessel at once and boil it all down to syrup in one go. You may put some of your sap in the vessel and add more sap to your boil throughout the day. Or you may run two vessels at once, boiling from raw sap to sweetened sap in one, and from sweetened sap to syrup in another. If you have a specialized sugaring pan like the ones we sell, you will be adding more sap to your pan continuously.
Whatever method you choose, keep boiling until what you have acts, tastes and looks like syrup. You can be as precise as you wish! Undercooked syrup tastes just fine, but does not have as long of a shelf life. Overcooked syrup is sugar, which tastes even better. But, if achieved by accident, overcooked syrup can lead to burnt pans and large messes, heartbreak and gnashing of teeth.
When is Maple Syrup Finished?
For an analog test, drizzle a bit of your boil on a cold plate and see if it acts like syrup. Or dunk a spatula in your syrup and see if it comes off in a sheet (syrup) or drops (not yet). For more precision, take a temperature reading. Maple syrup boils at 7 degrees above water. Water typically boils at 212°F so a boiling solution that measures 219°F is syrup. We have never had luck with our own cheap candy thermometer, so we recommend a maple syrup finishing thermometer for measuring syrup. You can check to see if you have achieved professional precision by taking a Brix reading with a syrup hydrometer. There are also less expensive, easy-to-use refractometers on the market.
A note about wood: many who make maple syrup using wood heat choose to draw off a bit early into another pot or pan and finish elsewhere. For example, a propane burner outside, or on the kitchen stove inside. This is because those methods allow us to better control the heat and better track the temperature. Wood heat is hard to regulate. High-quality thermometers need several inches of fluid to give a reliable reading. By pouring off and finishing elsewhere we try to ensure we do not overcook the syrup. Once you are at the finishing stage, it’s fine to bring your boil inside. At that point, you’ll make no more mess of your house than you would by making pasta.
ENJOY YOUR HOBBY!
Now that you are all set to collect your maple sap, enjoy the process. There are loads of reasons being in your sugar woods is good for your health. Enjoy the smells of the boil, the taste of the sweet sap, and the fresh spring air. Take some time to see, hear, and smell the sounds of spring. Your body and mind will thank you for it!
Happy sugaring, from our family to yours!
FOR MORE INFORMATION ON MAKING YOUR OWN, HOMEMADE MAPLE SYRUP CHECK OUT OUR OTHER HELPFUL HOW-TO BLOGS:
How to Filter Homemade Maple Syrup
How to Store Your Homemade Maple Syrup
A note on galvanized sap buckets: We’ve stopped using galvanized buckets since these images were taken. Galvanized buckets may contain lead, which may leach into your sap and be hazardous to your health.