
Making maple syrup was the hard part. Here’s how to turn your homemade maple syrup into maple cream!
Search the internet for how to make maple cream, candy and sugar and you will get plenty of hits. But many of these recipes call for starting with a light grade of syrup. If your hobby maple syrup operation is anything like ours, you mix the sap of your red or silver maples with your sugar maple sap. When doing this, you aren’t ever going to make a light syrup. That’s because the sap of these other maple trees doesn’t contain as much sugar as the sap of the sugar maple. It therefore needs to be cooked for longer to reach the density of syrup. More cooking means more caramelization which means darker syrup.
Does that mean that you can’t take your dark, homemade syrup and turn it into maple cream? We set out to find the answer to that question, and it is a resounding NO! You can totally make cream (and candy and sugar) from your homemade syrup, no matter what it looks like!
In fact, we created all three of these maple specialties in under two hours using the very darkest gallon of syrup we made this year. (Which is saying something.) And it all turned out wonderful. Here’s how!
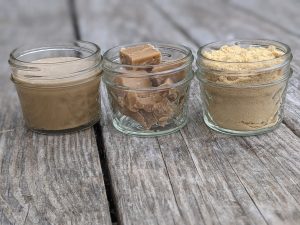
Homemade maple cream, candy and sugar. Incredibly easy. Incredibly tasty. And will impress your friends and family!
Calibrate Your Thermometer
As you already know, maple syrup boils at 7 degrees Fahrenheit above the boiling point of water. Generally speaking, this means 219 degrees Fahrenheit. But because the boiling point of water varies with elevation and barometric pressure, you first have to calibrate your thermometer. If your thermometer reads 212 degrees in a pot of boiling water, great! For the rest of us, there is the power of math.
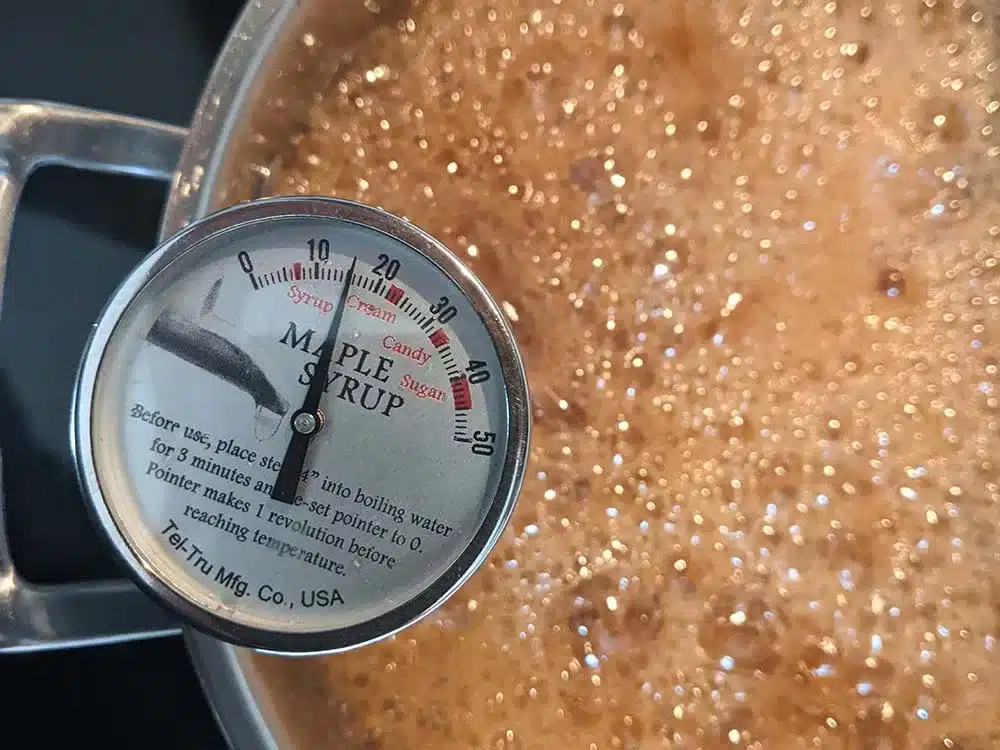
Incidentally, if you have the kind of maple syrup finishing thermometer that we carry, you don’t have to think about any of this. The face of the thermometer has calibration instructions and is marked at the boiling points of syrup, cream, candy, and sugar already.
In addition to maple syrup and a deep pot, to make maple cream, candy, and sugar in one go, you need a candy thermometer (or maple syrup finishing thermometer), a shallow pan, parchment paper, vegetable oil, a bowl of ice, an empty bowl or two, and a wooden spoon. If attempting to make all three in swift succession, you will need a helper, a standing mixer, or more than two arms.
Gather Your Supplies
To start making maple cream, we simply left our last batch of finished syrup on the stove. (For more information about how to know when your maple syrup is “finished”, check out our blog post on the topic!) You can take any finished syrup and put it into a large stock pot to get started. Then we then gathered the rest of what we would need: vegetable oil, a bowl of ice, an empty bowl or two, and a wooden spoon.
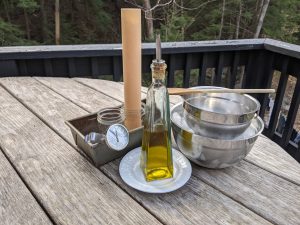
In addition to maple syrup and a deep pot (not pictured), to make maple cream, candy, and sugar in one go, you need a candy thermometer (or maple syrup finishing thermometer), a shallow pan, parchment paper, vegetable oil, a bowl of ice, an empty bowl or two, and a wooden spoon. If attempting to make all three in swift succession, you will need a helper, a standing mixer, or more than two arms.
Heat to 235°F, NO STIRRING!
The first step is to heat your syrup back to boiling on medium heat. Once boiling, we watched, without stirring, while the temperature approached 235 degrees Fahrenheit, or 23 degrees above the boiling point of water. Sometimes, the syrup bubbled up and almost went over the side of the pot. To battle the dreaded boilover, we smeared a little vegetable oil on the back of a wooden spoon and “pet” the bubbles with it to calm them down. Even though the process of obtaining the right temperature took 35 minutes, we watched it closely the whole time. Hell hath no fury like burned maple on an appliance.
Cool to 100°F
When the syrup reached 235 degrees, we poured it off into a small bowl and put it on ice until it chilled to 100 degrees. (Because our maple syrup finishing thermometer lacks numbers, we just had to wing it. Mom’s winging-it method worked just fine: if you can put your pinky in it for 3 seconds and stand it, you are just north of 100 degrees. If it hurts, keep waiting.) The cooling process took 30 minutes.
Stir, Stir, Stir…. Repeat!
When cooled to 100 degrees, begin to stir the syrup slowly. You want to stir until it begins to lighten in color and becomes the consistency of peanut butter (think Skippy, not freshly ground from the food co-op). This took a full 30 minutes. We let the standing mixer do the stirring for us, then poured the cream into jars and affixed lids. Maple cream will store in a refrigerator for at least 6 months. With about one-third of a gallon of maple syrup, we made a pint of maple cream.
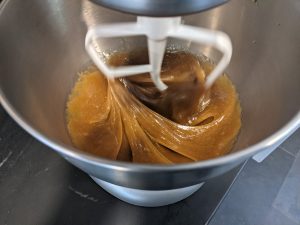
Maple cream, approaching peanut-butter-like consistency as it cools.
Other Ways to Prepare Maple
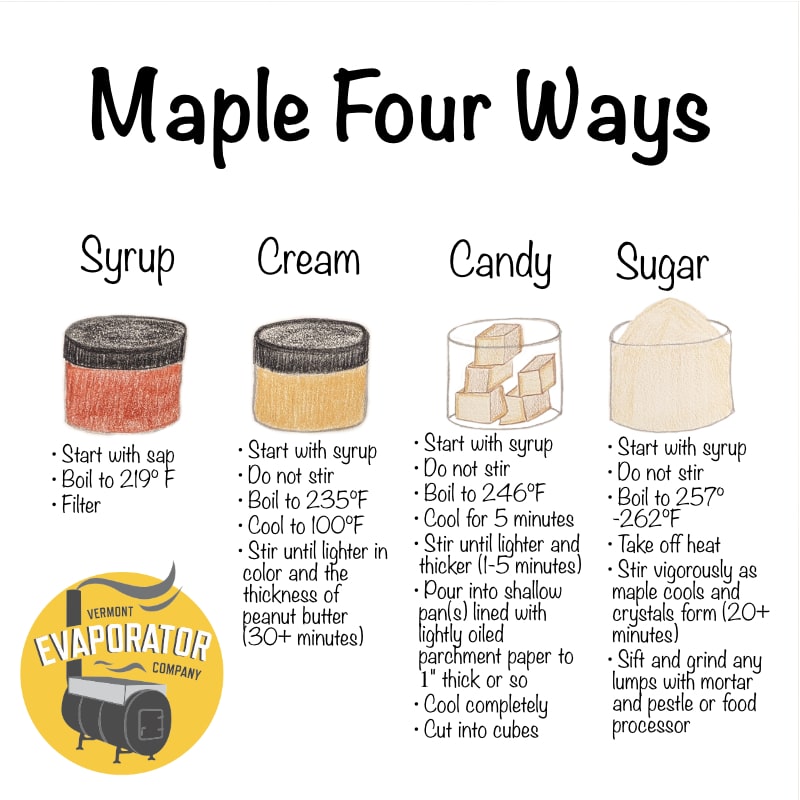
We’re amazed at how easy it was to make maple cream. When we undertook this process ourselves, we set out to make maple cream, candy, and sugar all at the same time. We successfully completed all three ways of preparing maple in under two hours. For more detailed instructions on how to make maple candy and maple sugar, check out our blogpost on the topic. For a quick guide, check out our infographic below. It has all the details you need to make maple cream, maple candy, and maple sugar.
Quick Start Directions for Maple Cream:
- Boil syrup to 235°F (or boiling point of water plus 23)
- do not stir
- Cool to 100°F (30+ min.)
- Stir slowly until lighter in color and the consistency of peanut butter (30+ min.)
- Store in refrigerator
Happy Sugaring from our family to yours!
