
Wood-Fired Baking on the Sapling
Baking bread on the Sapling is easy, delicious, and fun! If there’s nothing quite like fresh-baked bread, there’s nothing at all like fresh-baked bread made in a wood-fired oven! We’ve made all sorts of bread on our Sapling Everything Grill, like Pizza, Montreal Bagels, trendy garden focaccia, and crusty white loaves! We bet that other flatbreads like naans, pitas, and tortillas would be epic too!
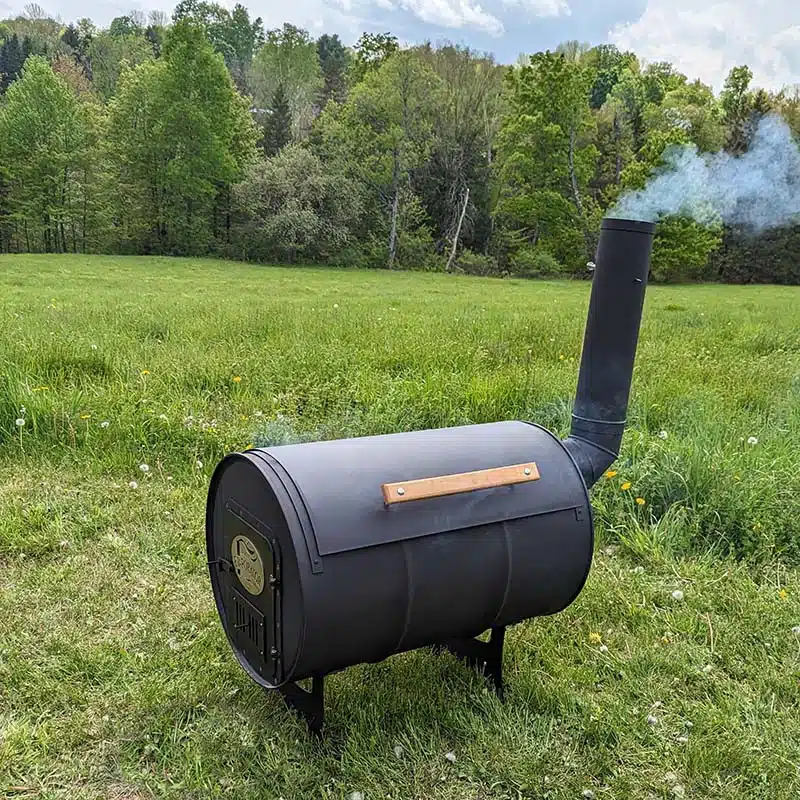
You don’t need a fancy outdoor kitchen for fancy wood-fired breads. The Sapling Everything Grill is an easy way to make wood-fired pizzas and breads. You can turn ANY grill into a bread and pizza oven by adding a pizza stone, but baking with wood makes a HUGE difference in taste.
Just like with grilling and smoking, there’s more prep and cleanup time involved in wood-fired baking than other alternatives, but taste is worth the time if you have it.
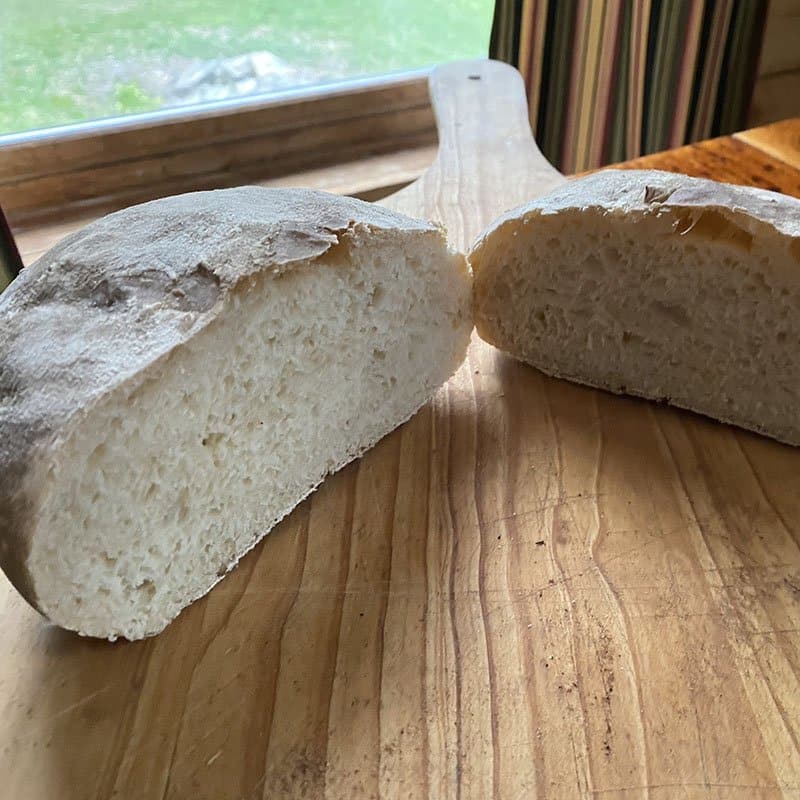
Perfection: King Arthur Flour’s No-Knead Crusty White Bread made wood-fired on the Sapling Everything Grill.
Wood-Fired Bread on the Sapling
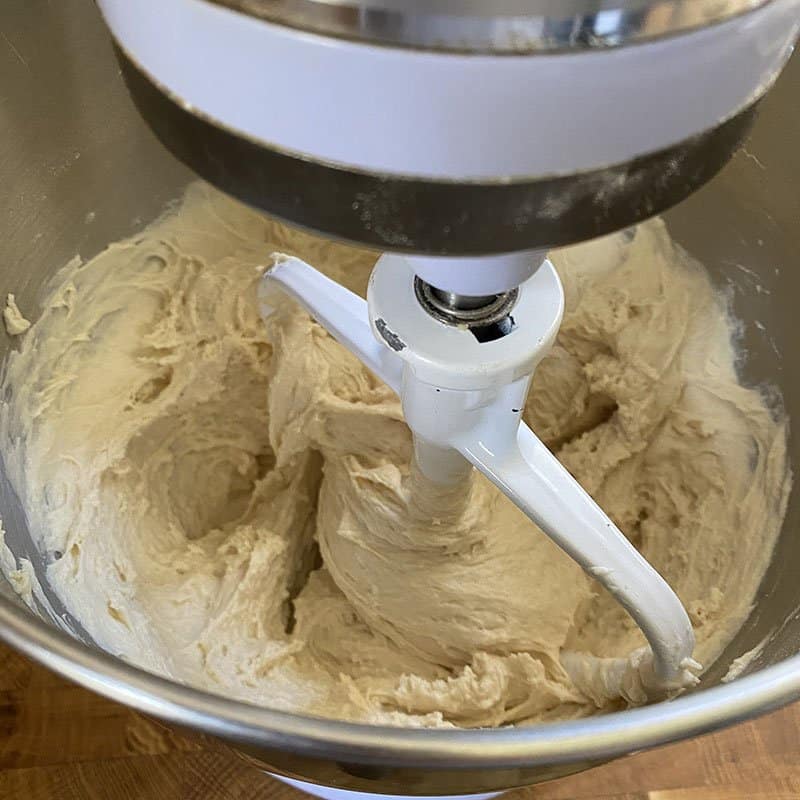
For your first rustic bread bake, we recommend choosing something easy and that you are familiar with. We choose to make King Arthur Baking’s No-knead Crusty White Bread recipe. We choose King Arthur Flour recipes whenever we can because the recipes are reliable and basic, and because they include both weight and volume measurements. Adding ingredients by weight tend to provide more consistent results. But you certainly don’t have to do it this way! Just choose something you are comfortable with, a good, reliable, tried and true bread recipe.
Let your dough rise
Start off by grabbing your favorite bread recipe, and get your dough rising. With about 30 minutes left of your second rise, it’s time to get your Sapling started.
Fire up the Sapling
To get started with your wood-fired baking on the Sapling, you’ll need to get a fire going! Before starting a fire in the barrel, there are a few things you should set up first! Be sure to remove the Sapling Baffle if you’ve used it as a smoker recently. To learn more about smoking on the sapling check out our blog here, or some of our favorite smoking recipes here!
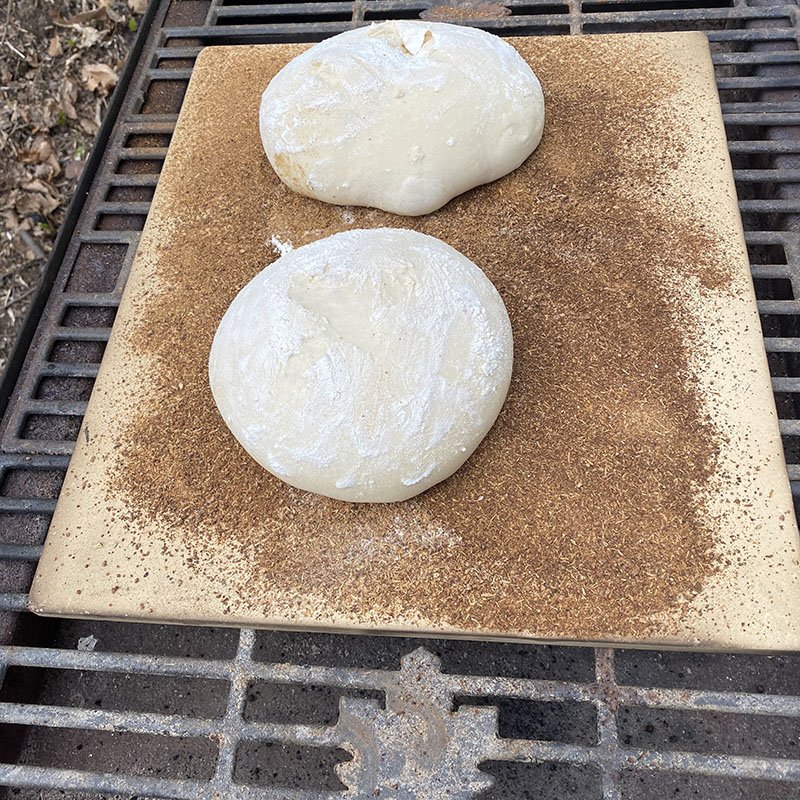
Then, ensure that your Sapling Pizza Stone is set on top of your Sapling Grill Grates.
Once set up, it’s time to start your fire. I like to start the fire in the front of the Sapling, near the door, since it’s easier to manage. And if your sapling accidentally gets a bit too hot, you can move your precious breads away from the fire.
I like to use a combination of charcoal and wood. Charcoal gives a more consistent, even heat, and wood gives you that smokey flavor. But you can manage with all wood or all charcoal. It’s up to you!
Pizza Stone
Our tip for keeping your pizza stone from breaking is to make sure it gradually changes temperatures. Put it directly on the Sapling Grill Grates before you start the fire, and don’t take it off until the entire Sapling has cooled down and is safe to touch. Our Sapling Pizza Stone is going on 5 years old now and is still in one piece!
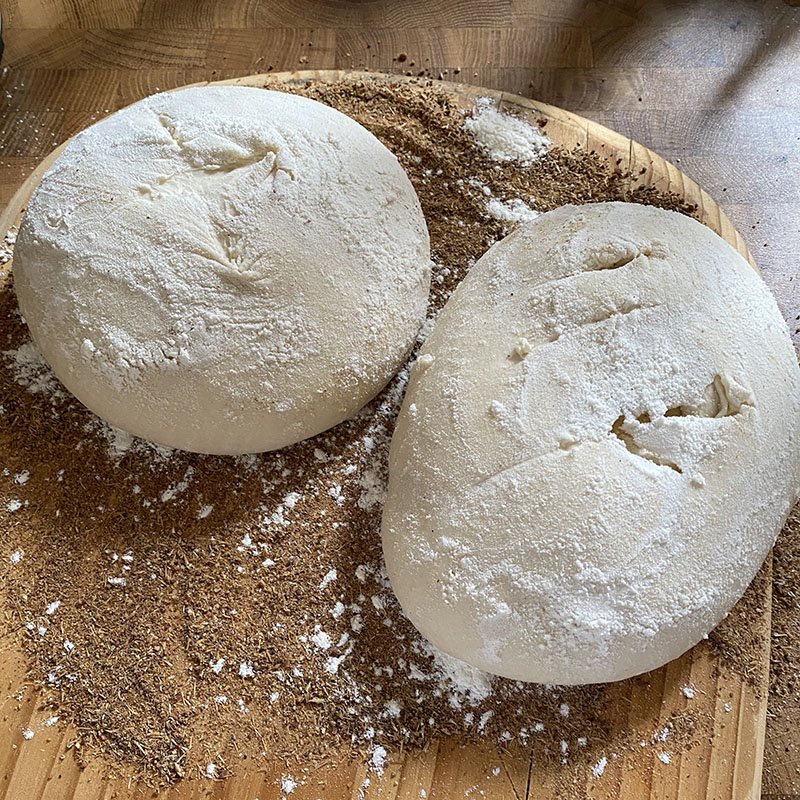
Prepare Your Loaves!
While your Sapling is heating up, get your loaves ready for the oven. Be sure to score them, if you’re into that kind of thing, and find a way to transfer them to the pizza stone that doesn’t disturb those tiny air bubbles you’ve worked so hard to form! In our image above, we used cornmeal to prevent the bread from sticking to the pizza stone. You can use flour, cornmeal (traditional), or parchment paper (easy peasy). This will make transferring your loaves easier, and help to make sure they don’t get stuck anywhere in the baking process Parchment paper can burn if exposed to temperatures higher than 450°F, but according to Americas Test Kitchen, it’s safe to use at these high temperatures, and they even recommend it!
Get your Sapling up to temperature
Once you have your fire started, you’ll need to get the temperature inside the Sapling up to the temperature required to bake your bread. Our recipe called for a 450°F, and it took us about 30 minutes to get there.
We used an ambient heat thermometer to measure the temperature inside the Sapling. You could also use an oven thermometer to keep track of the temperature too.
Baking your Bread on the Sapling
When your up to temperature, your bread has risen, you’re all set to go! We threw our bread on and waited the time suggested in the recipe. Once the time was up, we pulled it off, and gave it a knock. You’re looking for a nice hollow sound. Ours wasn’t quite ready, so we threw it back on to bake for a little longer. Once both loaves sounded hollow, we cut into them for some yummy fresh bread snacks!
Tips for Baking Wood-fired Bread on the Sapling
There is definitely a learning curve involved in figuring out how big of a fire to make, whether you want to add charcoal, how to get up to temperature quickly and then keep it even. But we enjoyed the challenge. Grilling is fast and hot, and smoking is slow and low, but baking bread involves sustaining an even, high temperature for an extended period of time. That’s a challenge! But bread is forgiving.
The taste was so good and so worth it! It had an intense smokey flavor on the outside with a great texture inside and out. We cut a few slices off for the kiddos to use as hotdog buns and the grown-ups ate it with cheddar and havarti with dill. Delicious. We all agreed that a nice mild, creamy cheese would have been an appropriate pairing as well!
Beating the Heat in the Summer
We really enjoy baking, grilling, and smoking on our Sapling in the summertime. We find that cooking or baking dinner in the house in the summertime heats up an already unbearably hot space. By taking these things outside, we (try to) keep our house cool in the summer, and add a great flavor to our summer meals. We also find we spend more time with family and friends when we pull out the Sapling. One of the goals of making the Sapling Evaporator is to allow people to spend time with family and friends outside. And now we’ve found a few more ways to bring that to you in the summertime.
FOR MORE INFORMATION ON GRILLING, SMOKING, BAKING, AND MORE ON THE SAPLING, CHECK OUT OUR OTHER BLOGS:
Grilling with Maple Syrup for All Diets
Dry Rub Smoking on the Sapling
Wood Fired Pizza on the Sapling
Baking on the Sapling