
Repackaging your homemade maple for gifts is an easy process. You can repackage your maple syrup in smaller bottles or gift bottles. Or you can transform your maple syrup into maple cream, candy, or sugar for a unique homemade gift! We’ll talk you through the easy steps of repackaging maple below.
Getting Started Repackaging Your Maple
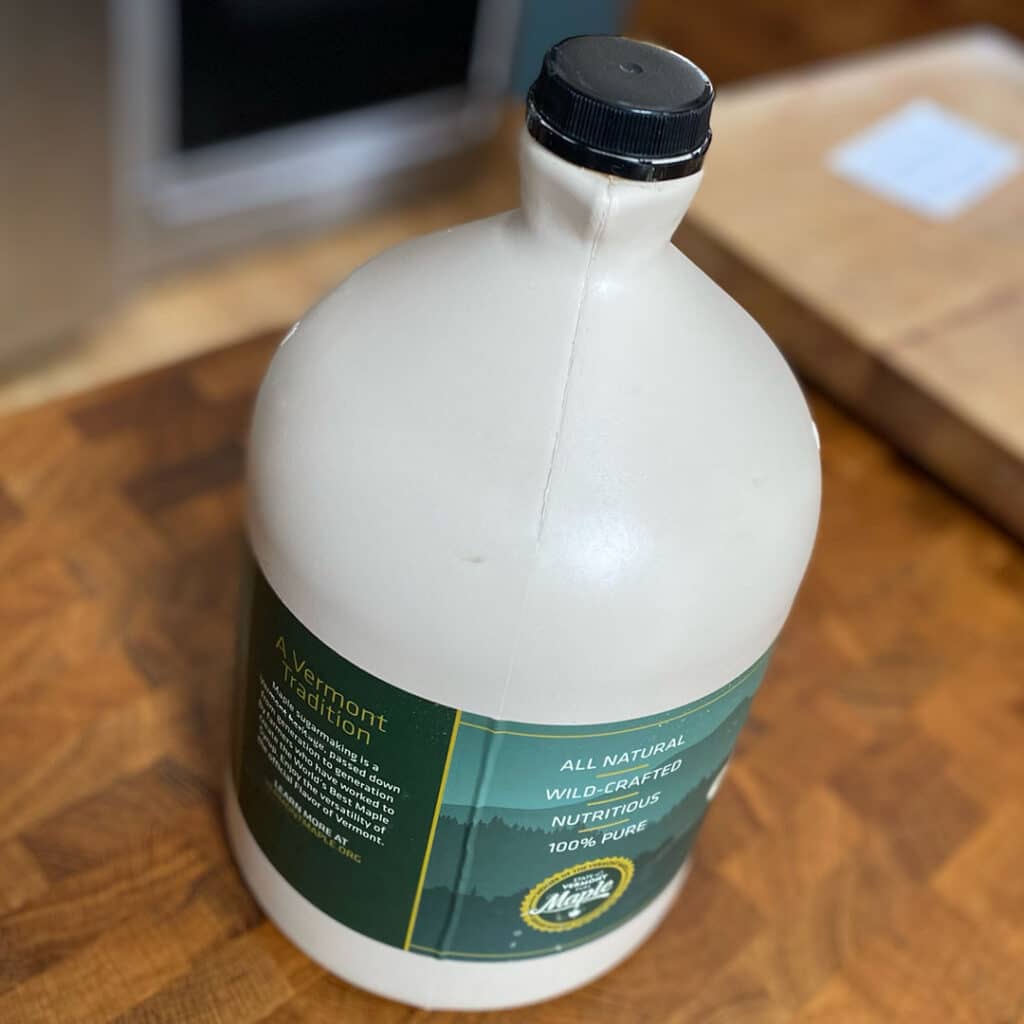
We all get tired at the end of the sugaring season. This year, I ended up packaging some maple into a gallon jug, just to finish up quickly! However, this gallon jug of maple syrup was too big for my fridge, and too much to open and use up in one day (even if it was an epic baking day.) I decided to repackage our maple syrup this holiday season into gift bottles, maple cream, maple candy, and maple sugar.
The first step, no matter how you are repackaging your maple, is to get your maple into a big pot on the stove.
Turn the burner up to high heat, and heat your syrup but not to boiling. Grab your thermometer and attach that to watch as the temp rises.
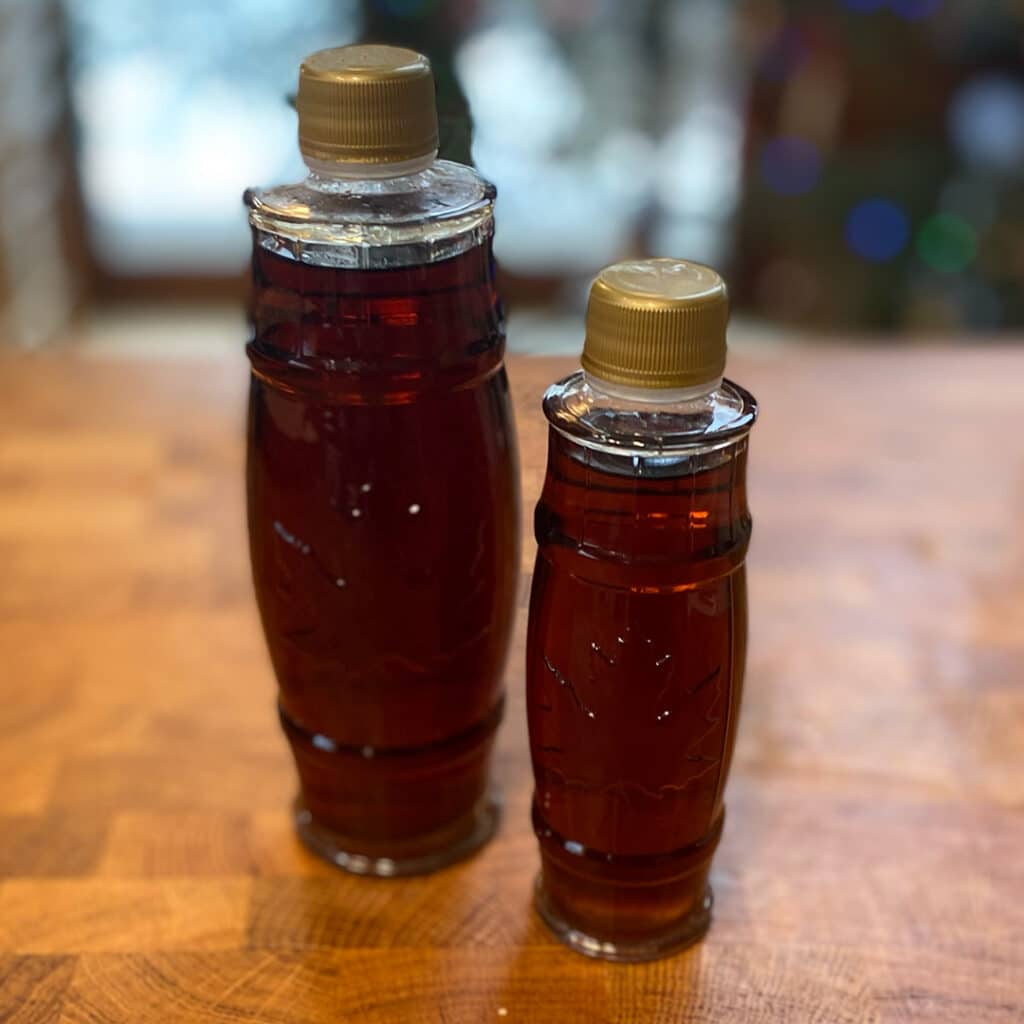
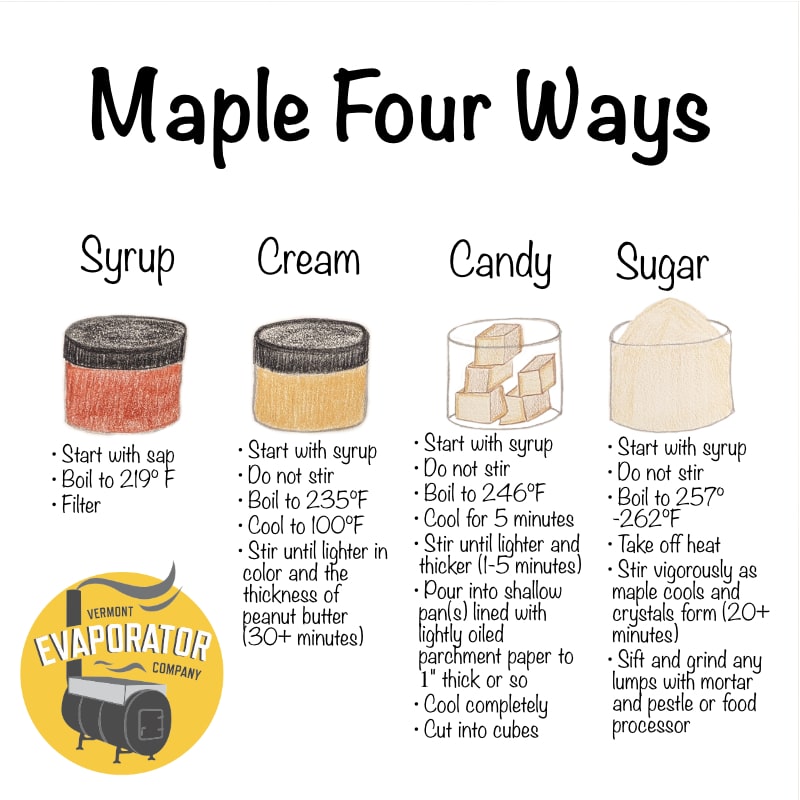
Rebottling Maple Syrup
The official standard for bottling maple syrup is that the temperature of the syrup needs to be at least 185°F in the new bottle for at least 3 minutes. When rebottling my syrup for gifts, I usually go as hot as I can without boiling to account for the temperature loss when pouring into my bottles. (If you end up boiling your syrup again, that’s ok, but keep in mind that for filtered syrup, it will have to be filtered again after each boil. See below.)
If you didn’t filter your maple syrup the first time around, now is a great time to do that. It provides you with a nice clean and clear look for gifts. All you need to do is pass your hot syrup through a maple syrup prefilter and filter. But if you don’t have one of these, or aren’t interested, no problem! The bits being filtered out are called sugar sand, and aren’t harmful. So filter if you want, or don’t! It’s totally up to you.
To make your syrup shelf-stable, you’ll need clean jars and sealing lids and actual syrup (meaning, syrup that boils at 219 Fahrenheit or measures 66 to 68 brix on a hydrometer.) Once the syrup is between 200 and 219°F (or after filtering, if applicable), simply fill the clean bottles with the hot syrup and put the lids on tight. Let your syrup and bottles cool and that’s it! Adorn the bottles with tags, bows, stickers, recipes, etc.
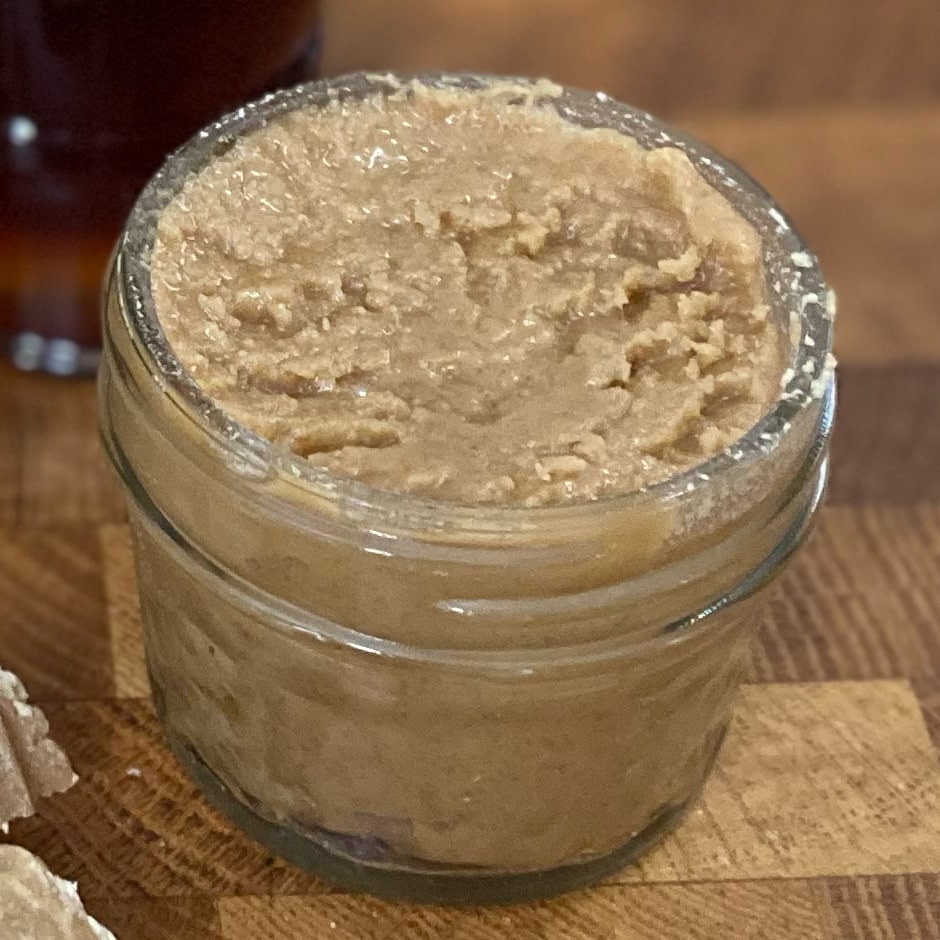
Repackaging As Maple Cream
Maple cream is easy to make, and a delight to eat! The first step is to boil the maple syrup until it reaches 235°F without stirring. Once that temperature is reached, remove from heat and allow to cool to 100°F. I prefer to pour the hot syrup into a bowl to allow it to cool. The photo above is of a fairly granular maple cream. It’s all delicious! But you can make it smoother with practice.
Once cooled to 100°F, stir until lighter in color and the thickness of peanut butter. Then pour into jars. Maple cream should be stored in the fridge for long-term storage. The maple cream is fine out on the counter or under the tree for the day. But should be stored in the fridge after that.
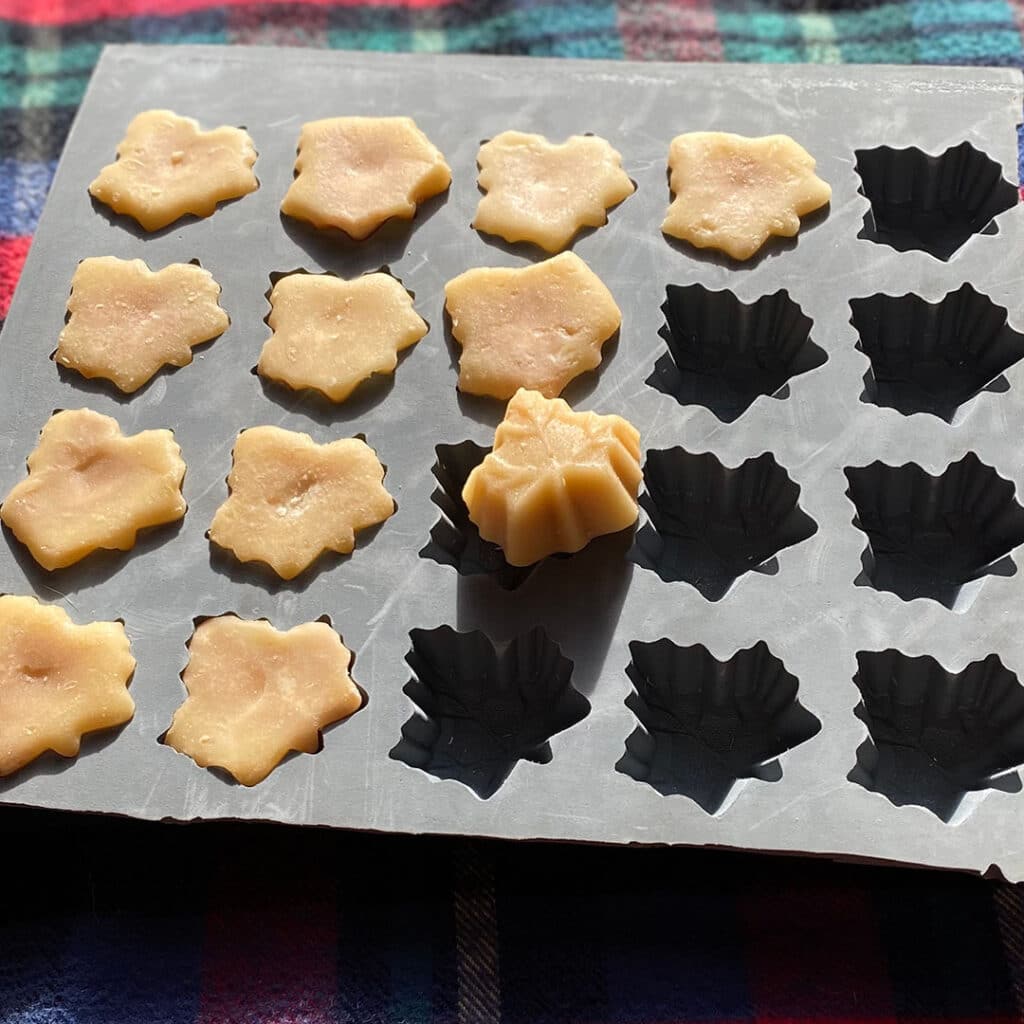
Repackaging as Maple Candy
For making maple candy, you can use a maple candy mold, or any shallow pan. So no special equipment is needed!
Start by heating your maple syrup, without stirring, until it reaches 246°F. While reaching temperature, prepare a shallow pan by lining it with lightly oiled parchment paper. Or get your maple candy mold ready.
Once at temperature, cool for 5 minutes. then stir, by hand, until lighter and thicker. This should be relatively quick. It typically takes us 1-5 minutes to reach candy. Then pour into your mold or pan. You want the candy to be about 1 inch thick. Let cool completely and demold carefully or cut into cubes!
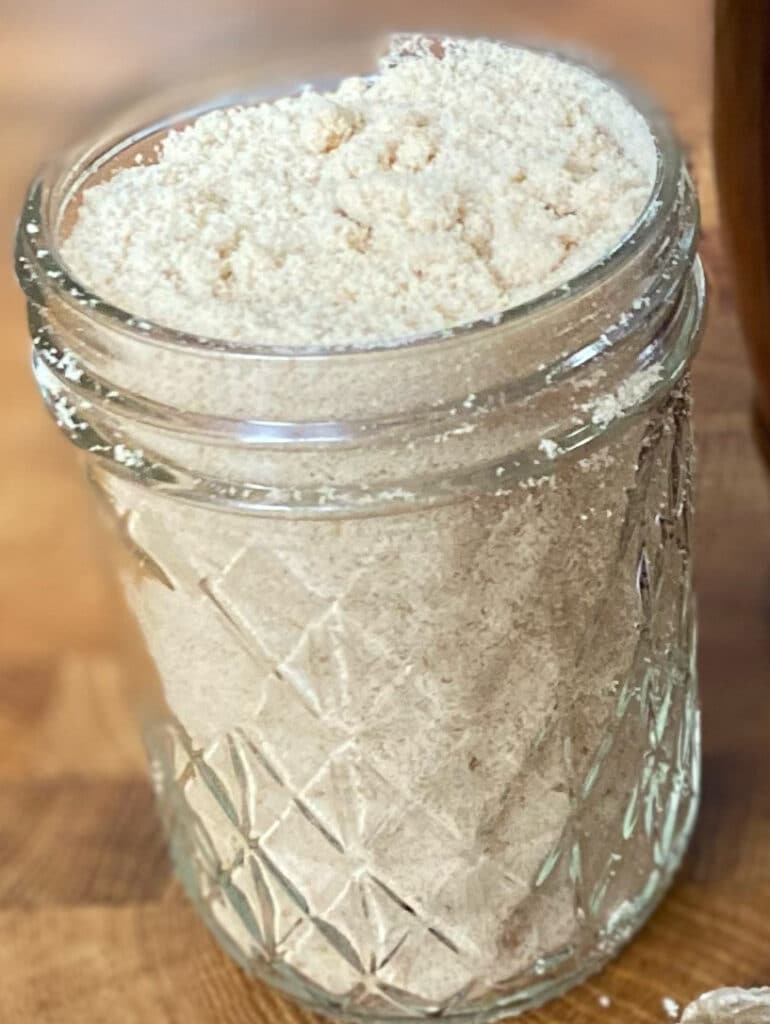
Repackaging as Maple Sugar
Maple sugar is my absolute favorite to make and gift. It’s a unique gift, and in my opinion, the easiest to make (between cream, candy, and sugar!) Its also easy for the recipient to use. To substitute maple sugar for white sugar, you simply replace white sugar in your recipe 1:1.
To make maple sugar, heat your maple syrup until you reach 257°F – 262°F. Warning: unlike when making maple syrup, the last few degrees for making maple sugar happen fast! Keep an eye on your syrup once is reaches 250°F.
After reaching 257°F – 262°F, remove from heat and pour into a stand mixer bowl. stir vigorously (taking care not to stir so fast as to spill over the top of the mixing bowl!) As you stir and the maple cools, the mixture will start to crystalize. This may take 10 or more minutes.
You can make maple sugar without a stand mixer, you’ll just have to mix for longer. But, again, no special equipment is needed. A mixer just makes it easier!
When your mixture has turned to sugar, we recommend sifting or grinding any lumps so you have a nice smooth sugar texture. you can use a sifter, mortar, and pestle, or even just toss it in your food processor. Easy peasy.
Let The Maple Gifting Begin!
And that’s it! Now you know how to repackage your homemade maple for gifts. This holiday season, I attempted to do all 4 types of repackaging at once. While I don’t recommend doing that your first time, it is possible with a calm, cool, and undistracted 2-ish hours.
To learn more about how to make maple syrup, maple cream, maple candy, and maple sugar, check out our in-depth blog posts: