
This post was written by Lori, a customer of ours from Missouri. In this post, Lori describes how she built a cinder block firebox for her Sapling Evaporator Pan. May it inspire you to DIY! Thanks Lori!
Falling in Love with Maple
On our honeymoon in January at the Wildflower Inn in Lyndonville, Vermont (36 years ago), we visited a maple sugaring farm. It was down the little country road, Darling Hill Road, that we were staying on. Ever since then, we’ve been hooked on real maple syrup. Years later, when we moved to a home in Missouri that has a little patch of sugar maples, I was eager to figure out how to harvest and create the “liquid gold” that we love so much.
Sugaring with Bad Pans
I tried jumping into it in a way that was least expensive. I tapped the trees and gathered the sap. My trouble was in the boiling down process. We first tried to boil with a pan that was not intended for the maple evaporating process and on a fire pit that was purchased from a home improvement store. It failed every time: burnt or spilled, or just taking way too long.
Finding the Sapling Evaporator Pan
I decided to research evaporators and sugaring pans. I found Vermont Evaporator Company and decided that the Sapling Evaporator Pan was the best pan for me.
Then I wanted to figure out a different solution for the firebox that would fit my needs: budget, permanent, and easy to keep the fire going. My husband suggested building a cinder block base with a front opening and a chimney out the back for the needed airflow. So I got to work with my pencil and grid paper to see if these cinder “building” blocks could easily be used for what I needed.
Designing a Cinderblock Firebox
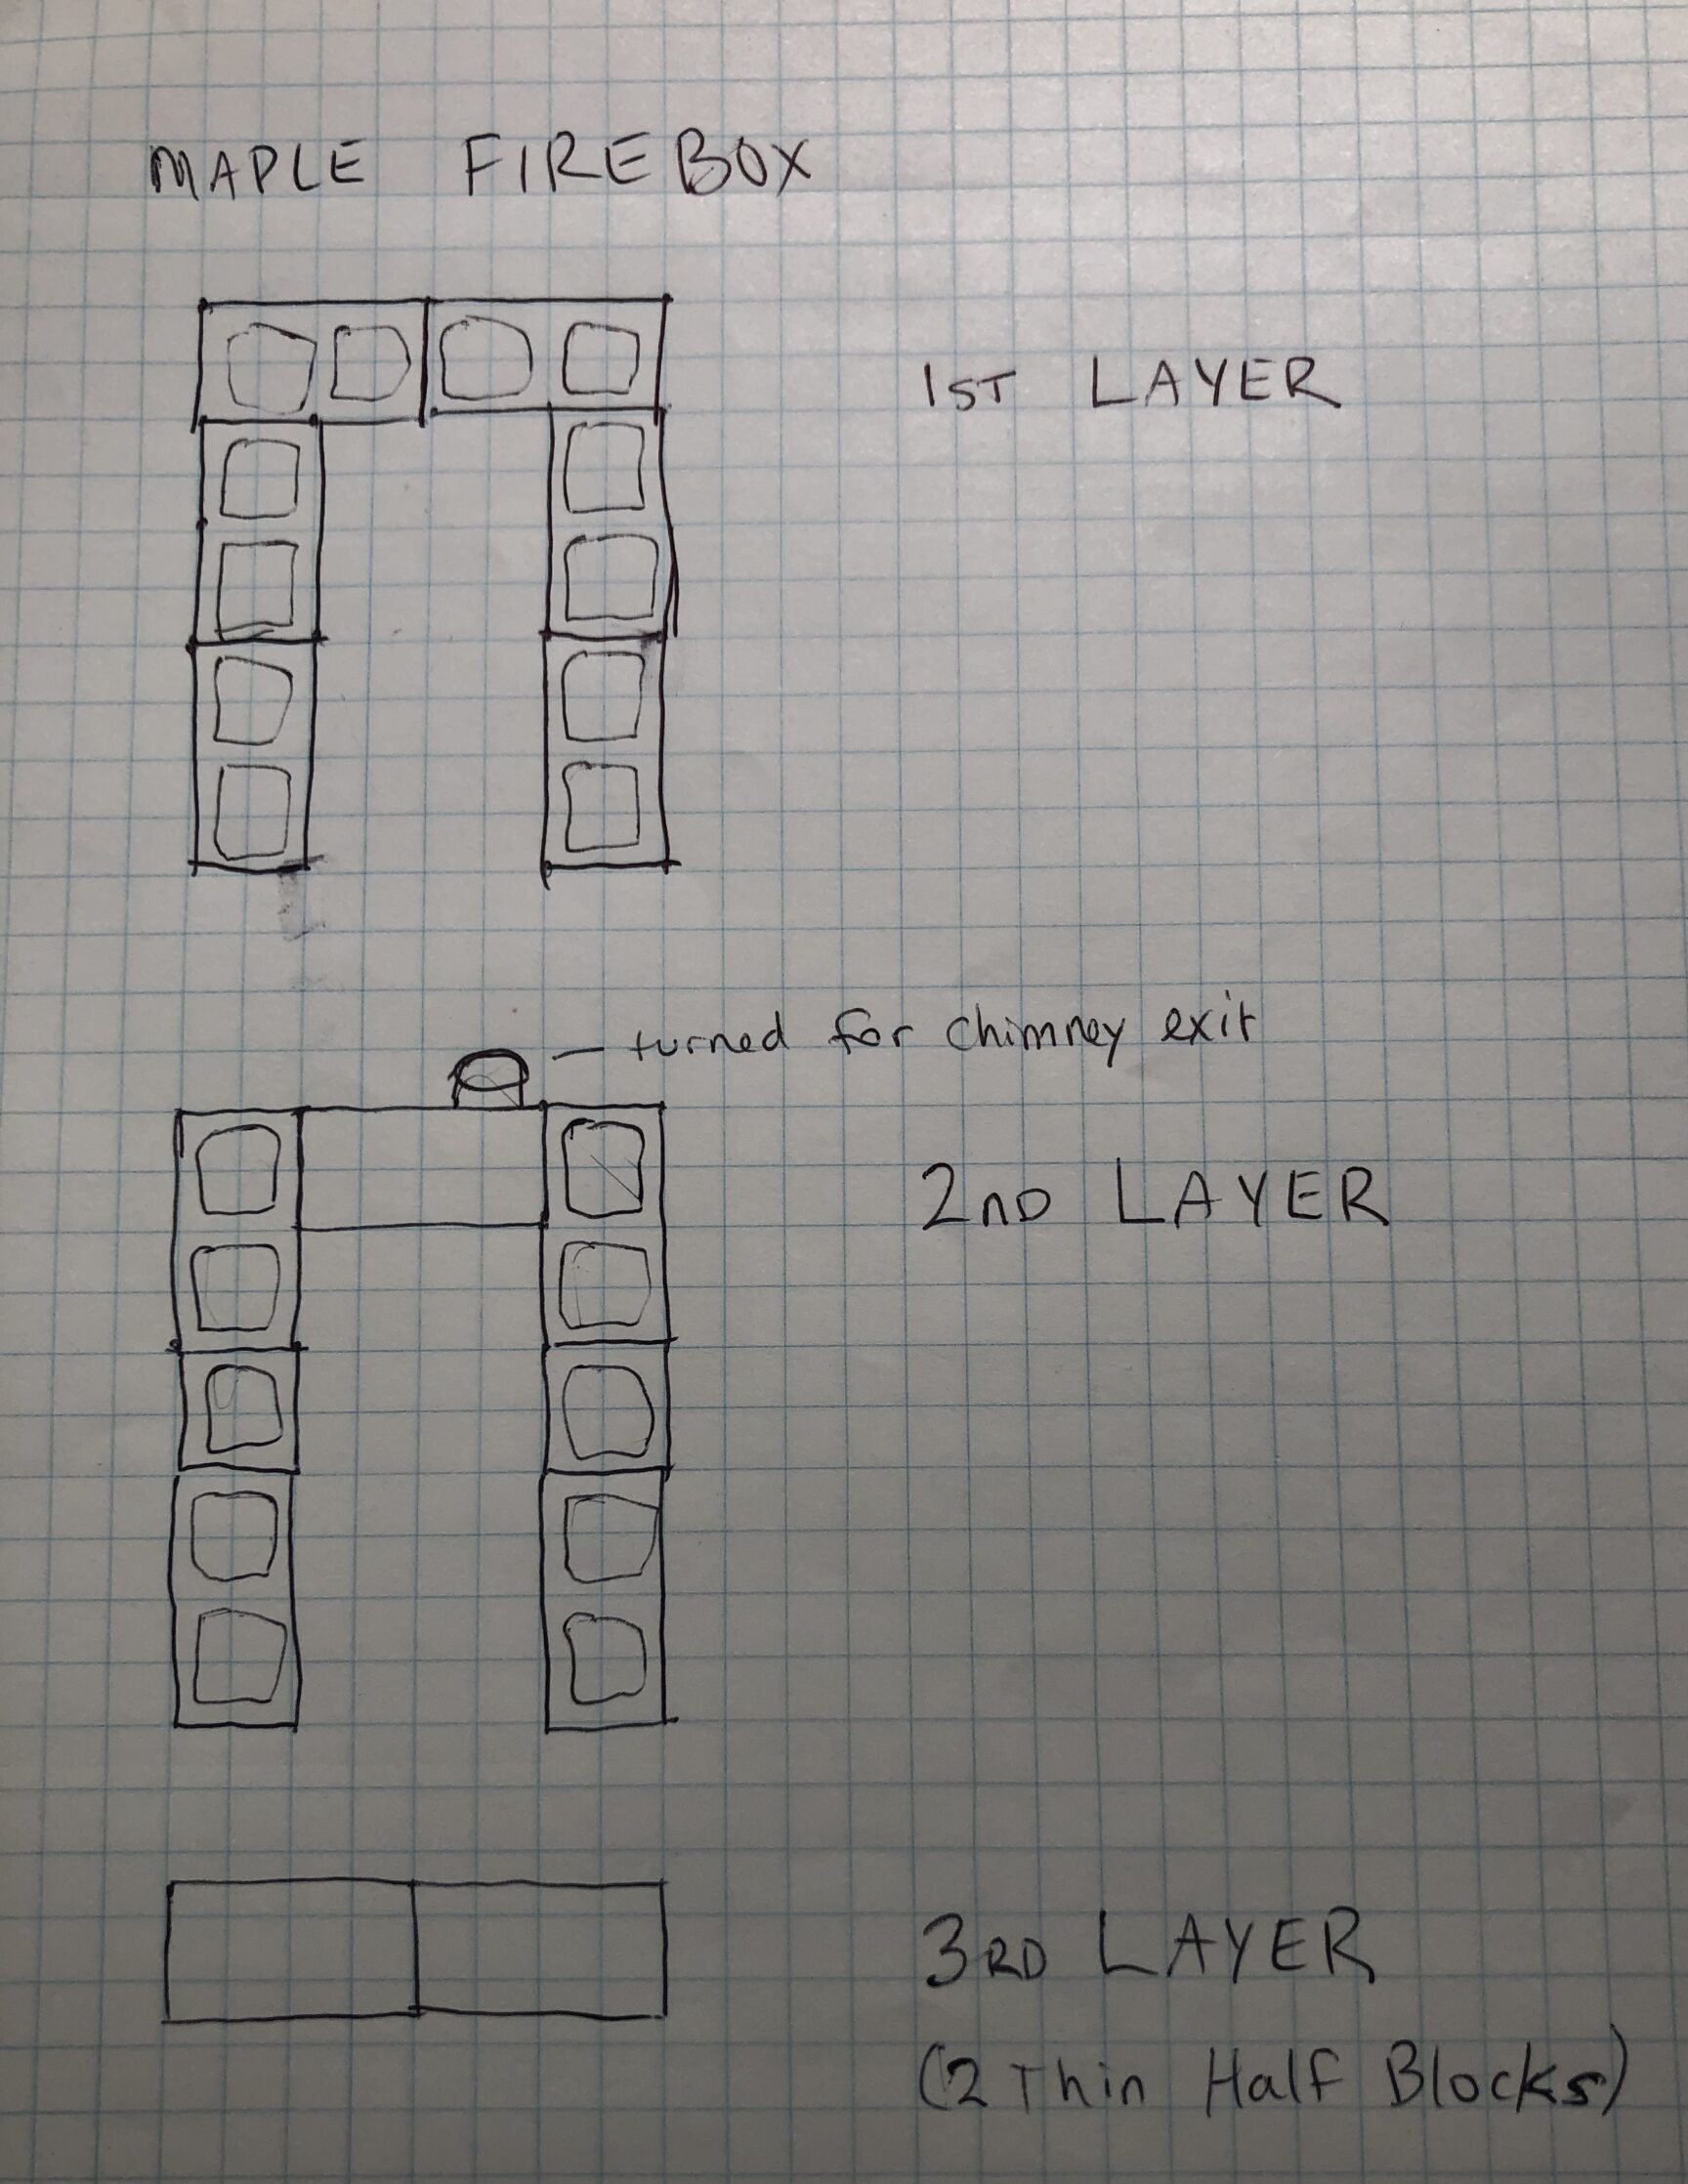
The Sapling Pan is 20 inches by 30 inches. For the pan to be stable, I wanted about two inches of the long edges of the pan to sit on top of the blocks. The front of the firepit is open and for a door, we used an old (warped) griddle that we were going to throw away. We propped it up in front (on two fire bricks on the ground) with enough gap to let air flow in (and we can adjust for how the wind is blowing that day). The back has an opening for a chimney – we used 4″ metal ductwork.
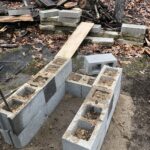
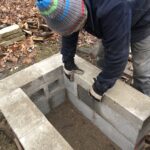
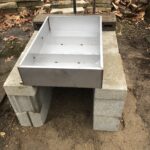
So the interior perimeter of the fire pit is 16 inches by 32 inches. There are six full-sized blocks set up on the first level. Then five full-sized and two half-sized blocks on the second level. On this level the full-sized block at the chimney side of the box is turned on its side so that the chimney pipe can be inserted through here. The chimney needs some support, so we used two metal stakes and some old wire to secure it. We used two thin half blocks on the third layer. This is so that we can pull the evaporator pan forward a bit and have the blocks at the back by the chimney to stop any smoke coming out from the back of the box.
An Affordable and Durable Firebox for the Sapling Pan
In all, we were able to build this firebox for $65!
One more helpful hint: we stacked up a few extra cinder blocks about a foot to the side of the firebox so that we have a resting place for the pan when we need to remove the pan from the heat.
We have used this firebox with our Sapling Evaporator Pan for four years now and the only thing we have replaced is the 90 degree elbow for the chimney. We are enjoying the process of making our own “liquid gold” and will continue to do so for years to come!
Firebox Parts List
- 12 Cinder Blocks (16″x8″x8″)
- 2 Half Cinder Blocks (8″x8″x8″)
- 2 Thin Half Cinder Blocks (16″x8″x4″)
- 1 each 4″ Pipe – 90 Degree Elbow
- 1 each 4″ Pipe – 5 Foot Length
- 2 each 4 Foot Metal Posts
- Metal Wire