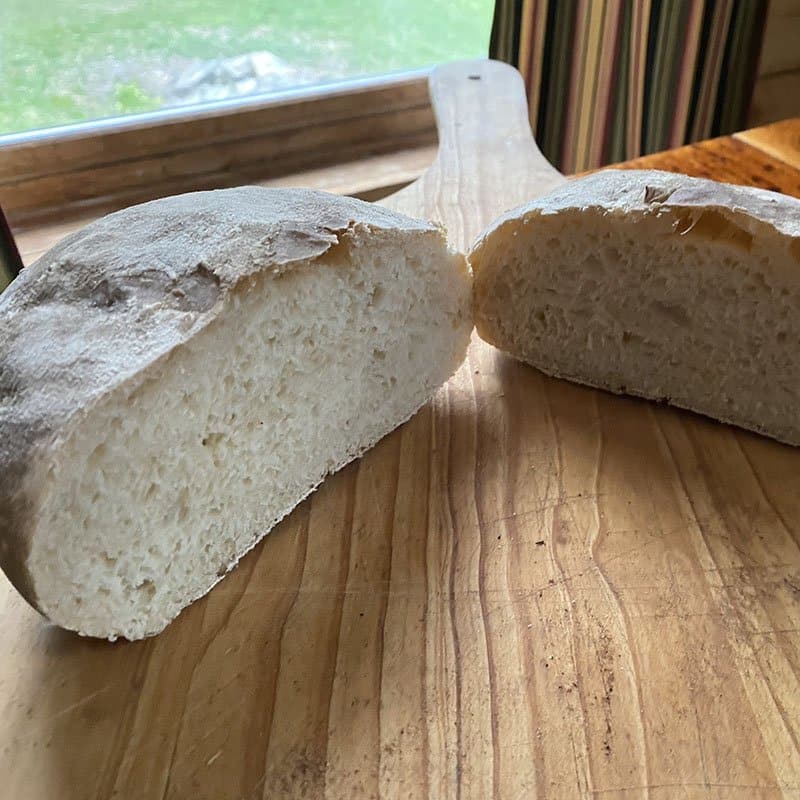
How to make delicious, fresh, wood-fire bread on the Sapling Everything Grill!
Perfection: King Arthur Flour’s No-Knead Crusty White Bread made wood-fired on the Sapling Everything Grill
If there’s nothing quite like fresh-baked bread, there’s nothing at all like fresh-baked bread made in a wood-fired oven! While, thus far, we’ve tended to stick with making flat-bread-like-substances such as pizza, Montreal bagels, and a trendy garden focaccia on our Sapling, this week we gave a good old fashioned crusty white loaf a try. Did we succeed? Oh yes we did! Here’s how.
Kate: Thanks for taking on the challenge of baking bread on the Sapling Everything Grill, Nikki. How long have you been baking bread?
Nikki: My pleasure! I started baking bread about eight years ago. I was living in Singapore at the time and the only bread available there has the consistency and taste of Wonderbread. Not my jam. So I started making my own sourdough there and eventually branched out to all kinds of bread. When I moved back to the US, I just kept baking.
Kate: Are you good at it?
Nikki: Um. I like my bread, and other people like my bread. I still make mistakes. But you don’t learn without making mistakes. You don’t get better without mistakes.
Kate: Before you started baking on the Sapling, had you ever tried wood-fired baking?
Nikki: Not really. I had eaten some dutch-oven campfire cooking before (your brother once made me a chocolate chip cookie on a campfire – virtually raw but very tasty) but that’s it, really.
Kate: What made you want to try it?
Nikki: Well, I love baking bread, but I don’t want to bake bread inside the house in the summertime. So, I intend to use my Sapling as a kind of summer kitchen. I also like to add flavor to the bread I bake. I love the extra flavor of sourdough, and I often use the malt leftover from a homebrew as extra flavor in my breads. The wood-fired pizza we make on our Sapling has amazing taste. I wanted to see how I could use wood fire and wood smoke to flavor an otherwise simple loaf of white bread.
Kate: Cool. Are you glad you gave it a shot?
Nikki: Totally! There is definitely a learning curve involved in figuring out how big of a fire to make, whether you want to add charcoal, how to get up to temperature quickly and then keep it even. But I enjoyed the challenge. Grilling is fast and hot, smoking is slow and low, but baking bread involves sustaining an even, high temperature for an extended period of time. That’s a challenge! But bread is forgiving.
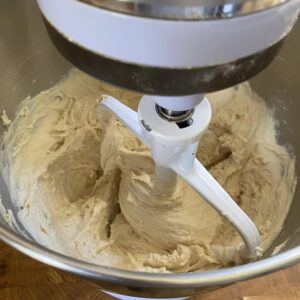
No-knead bread can be mixed in a mixer or by spoon; the dough is fairly sticky going into the rise.
Kate: Walk us through how you did it!
Nikki: OK. In addition to my Sapling Everything Grill, I used an oven thermometer, a food scale and a mixer. The food scale and mixer are optional, but the oven thermometer is key. Oven thermometers are easy to find for $10 or less if you don’t already own one.
I choose King Arthur Flour recipes whenever I can because the recipes are reliable and basic and because they include both weight and volume measurements. (I prefer to bake by weight for more consistent results. But you certainly don’t have to.) I use King Arthur Flour whenever possible, as well, for consistently good results. For this bake, I chose to make half of King Arthur Flour’s No-Knead Crusty White Bread.
First, I combined the ingredients. After weighing out the warm water, I added the yeast and stirred with a fork. I let the yeast mixture be for a minute or so to allow it to start foaming.
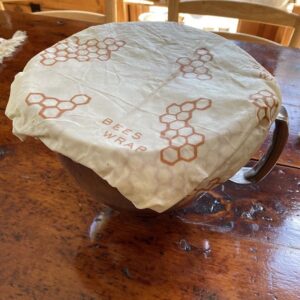
Bee’s wrap is our go-to plastic-wrap alternative for rising dough as well as storing food.
I then added the flour and salt. I beat the dough in a mixer for a few minutes, covered it in bee’s wrap and left it on the counter for two hours. (I then stuck it in the fridge until I was ready to bake. This is an available but optional step.)
When it was go-time, I took the dough out of the fridge, and, with heavily floured hands on a heavily floured board, I made two loaves and placed them on my pizza paddle on a layer of dried malt. (The recipe calls for parchment paper, but I don’t stock that in my pantry. I could have also used a cookie sheet and cornmeal.) I floured the top of the loaves and left them to rise for one hour. At thirty minutes to go, I got my Sapling ready.
For this bake, I put the efficiency baffle in the middle of the barrel opening, with the pizza stone sitting on the grill grates directly above it. I figured this would expose the bread to some but not all of the smoke from the fire. In the future, I will try different orientations to see what the variation in taste is, if any, to test this assumption. Note that it’s important to heat the stone up with the rest of the oven from the very beginning.
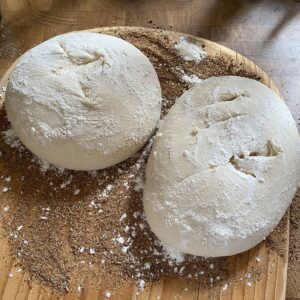
Malt that was first used to make beer and then dried, is used here in place of the traditional cornmeal. The malt helps ensure that Nikki’s loaves can travel from pizza paddle to oven without changing shape or disturbing the rise.
Kate: So how did you fire up your Sapling?
Nikki: With the grill lid off, I made a small fire in the front of the barrel. During this stage, I probably used five pieces of our sugar wood. When I judged that the fire was big enough, I spread it the full length of the barrel, put the oven thermometer on the stone, and put the lid on the grill. Every five minutes, I would peek under the lid to see what temperature the oven was at. When it got to 450 degrees, I quickly slid the loaves on the stone and put the lid back on.
During baking, I continued to check the temperature by cracking the lid to see the thermometer every 5 minutes, adding wood whenever the temperature started falling, but erring on the side of cooler temperatures rather than hotter temperatures. (I’ll tell you my burnt-garden-focaccia story some other time.) In all, I probably only added three more pieces of wood the entire bake. It was incredible how little fuel it took to bake the bread.
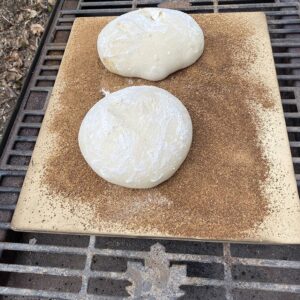
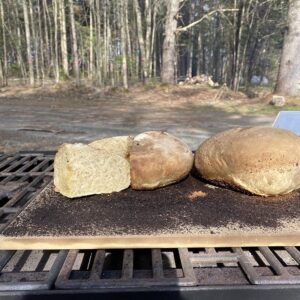
The loaves of bread on the Sapling both before and after the bake. Notice how you can’t even see any smoke! It only takes a small wood-fire to bake bread on the Sapling.
Kate: How did you know when the bread was done?
Nikki: When the time indicated by the recipe had elapsed, I took out a loaf and gave it a knock, hoping to hear a hollow sound. It sounded a little dense, indicating that it was underdone. But I was worried about the color on the outside of the loaf getting too dark, so I cut it open anyway! I was right! It was underdone. There was a golf-ball sized raw bit in the middle. So I simply put the open sides of the loaf back on the stone and gave it five more minutes. In the end, both the sliced and unsliced loaves were perfectly done, both inside and out.
Kate: That’s awesome! And the taste?
Nikki: Really, really good. It had an intense smokey flavor on the outside with a great texture inside and out. I cut a few slices off for the boys to use as hotdog buns and your brother and I ate it with cheddar and Havarti with dill. Delicious. We both agreed that a nice mild, creamy cheese would have been an appropriate pairing as well!
Kate: Sounds like a resounding success. What will you try next?
Nikki: Next up is sourdough. Can you imagine a wood-fired sourdough turkey club? Yikes. And then Montreal bagels, pretzels, tortillas and naan. The fun part with those last two will be that I’ll be grilling things to go in the tortillas and naan right on the Sapling at the same time. Amazing!
Kate: What advice do you have for others who are going to try their hands at wood-fired baking on the Sapling?
Nikki: Start with easy, quick recipes like this one first. It will take some time for you to get used to how your Sapling works, how your wood burns, etc. Have patience and know that, in the end, it’s going to taste good. Try things. As with all culinary endeavors, there is no one way to do it. Your task is to find your way! That definitely applies here.
Kate: A great note to go out on. Thanks again, Nikki. Let’s talk again soon!
Nikki: You bet!

